Get started
Getting started
Three steps take you from a new account to your first scan. Lookout only reads your website; it never changes it.
Before you start
You need a Google account that can see your site in Google Search Console, as an owner, a full user or a restricted user. Lookout adds sites from Search Console, so it can only monitor a site you have verified there.
Set up your first project
Step 1: Connect Search Console
Go to Settings, then Projects, and choose Connect Google Search Console. Google asks you to give Lookout read-only access to your Search Console data.
Signing in to Lookout with Google doesn’t grant this access, so Google asks even if you signed in with your Google account.
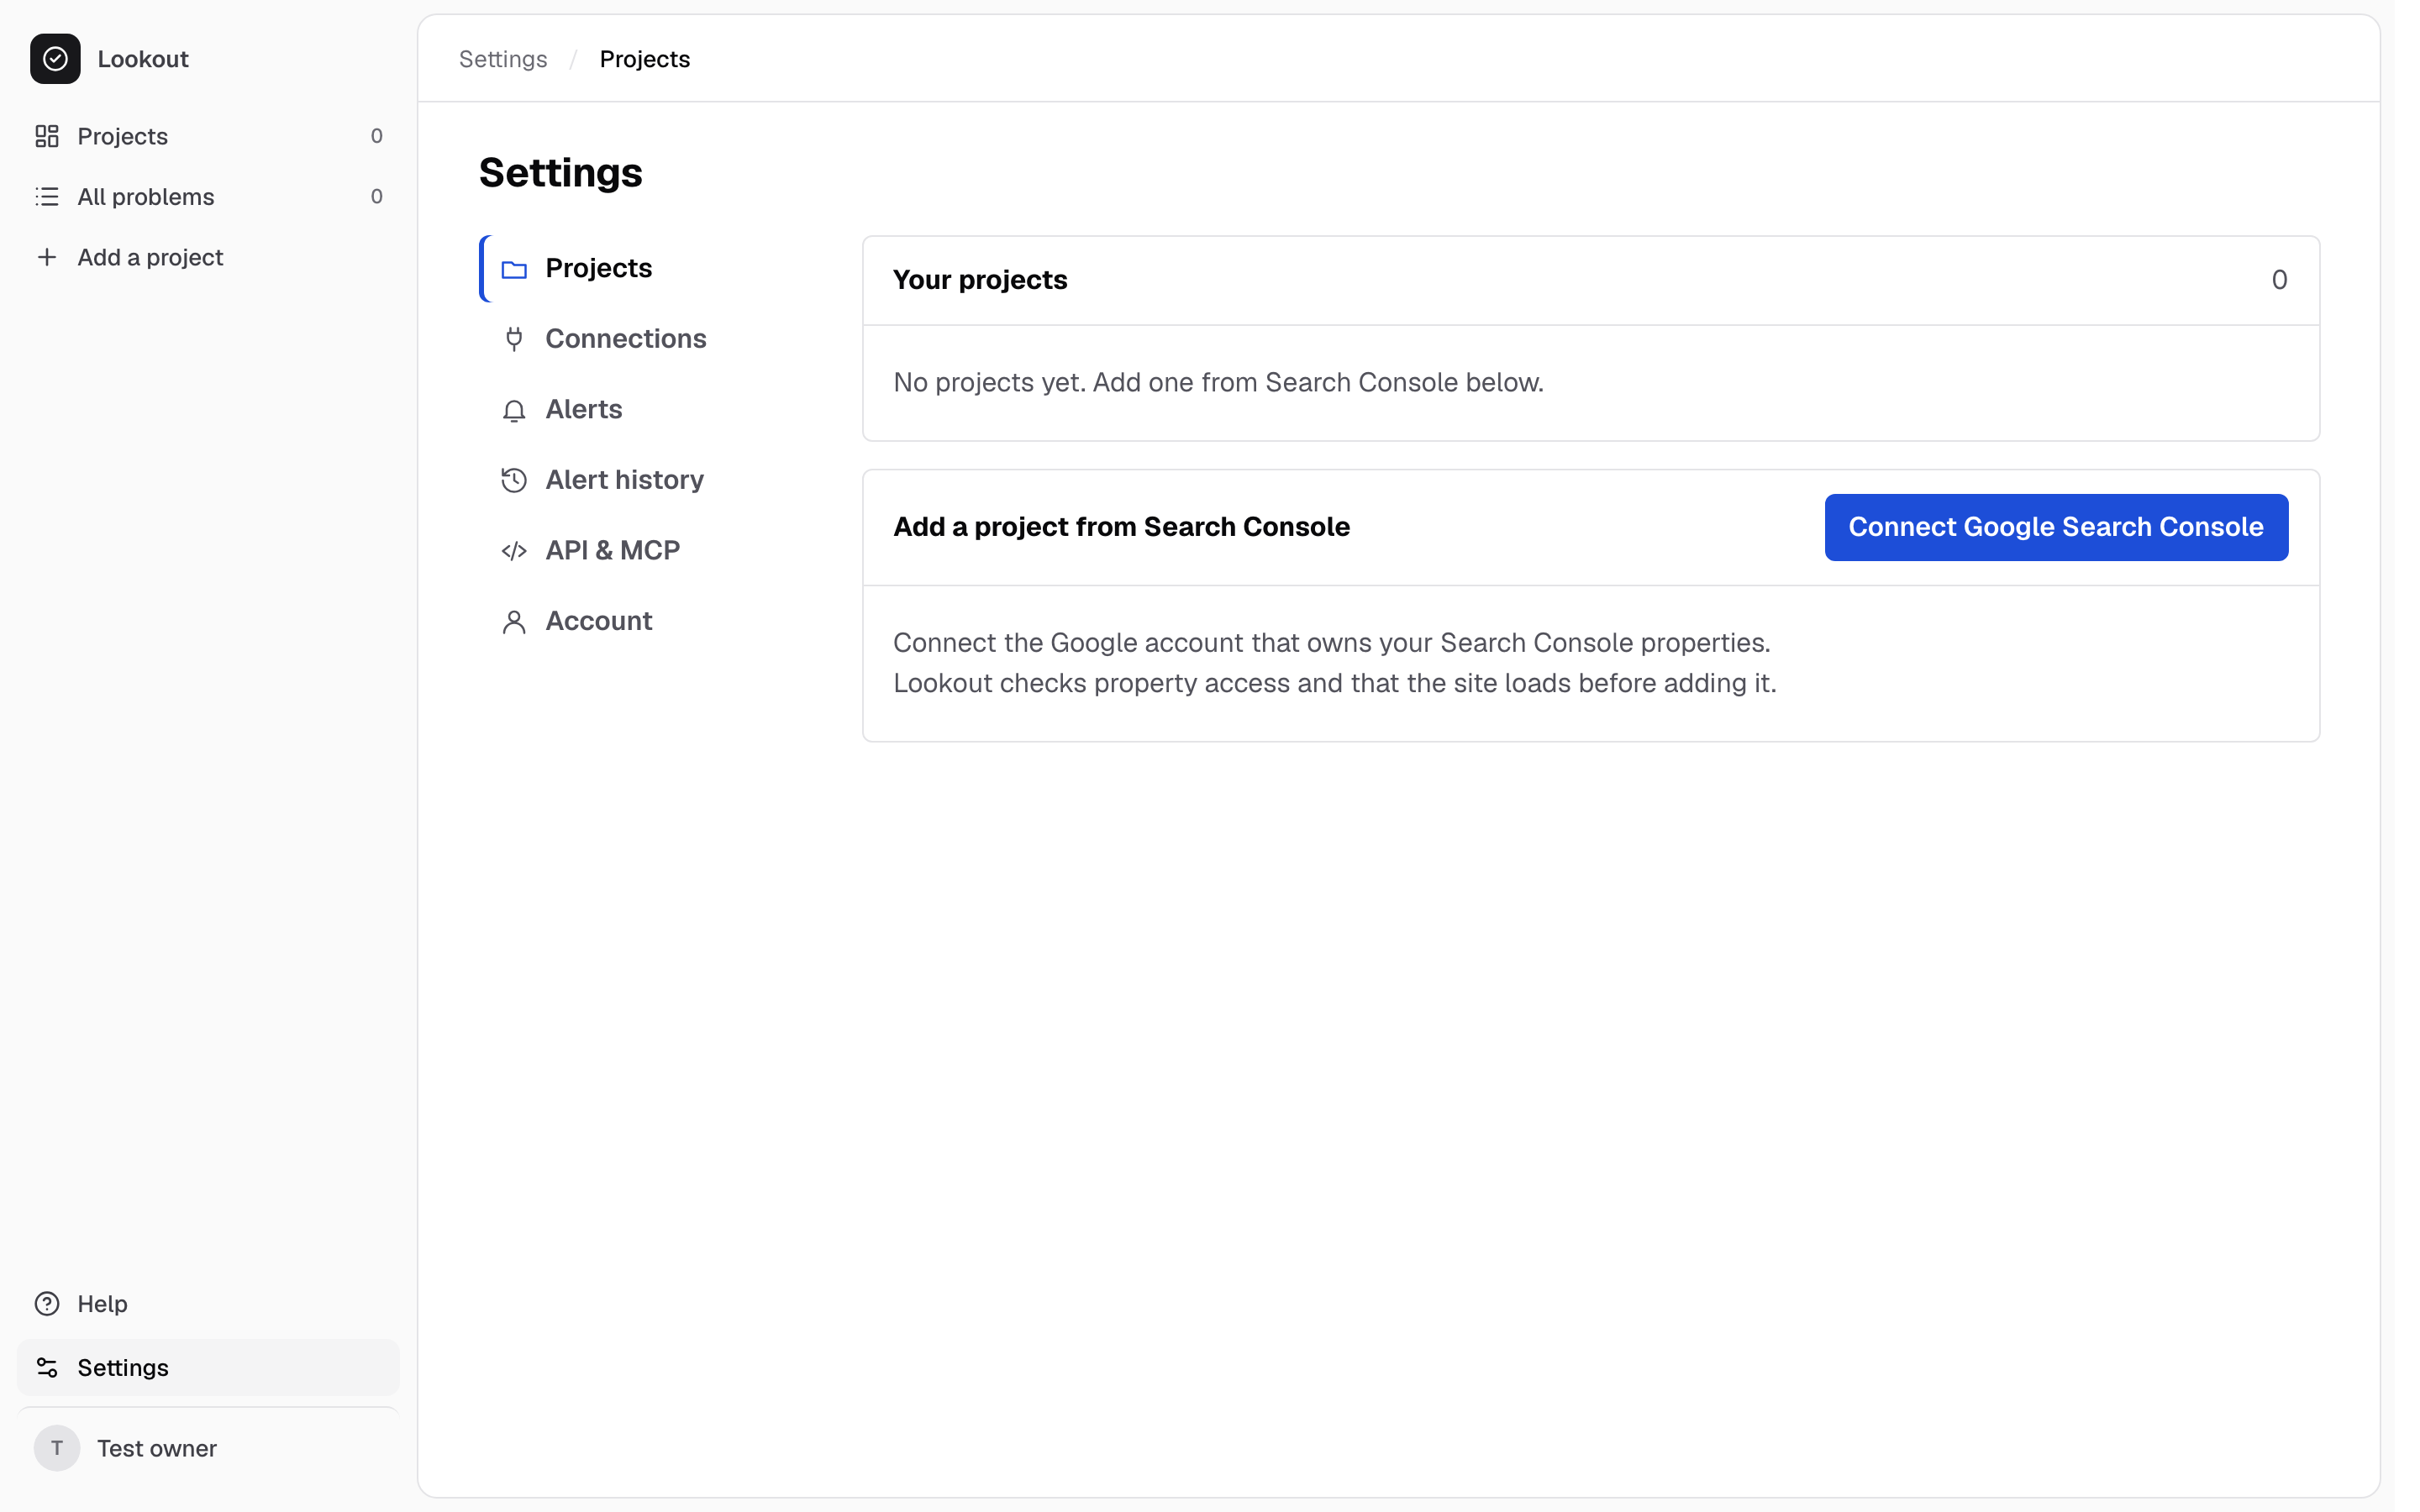
Step 2: Add a project
Pick a verified property from the list. Before adding it, Lookout checks with Google that you can still see it, and checks that the site’s home page answers with a web page. URL-prefix and domain properties both work.
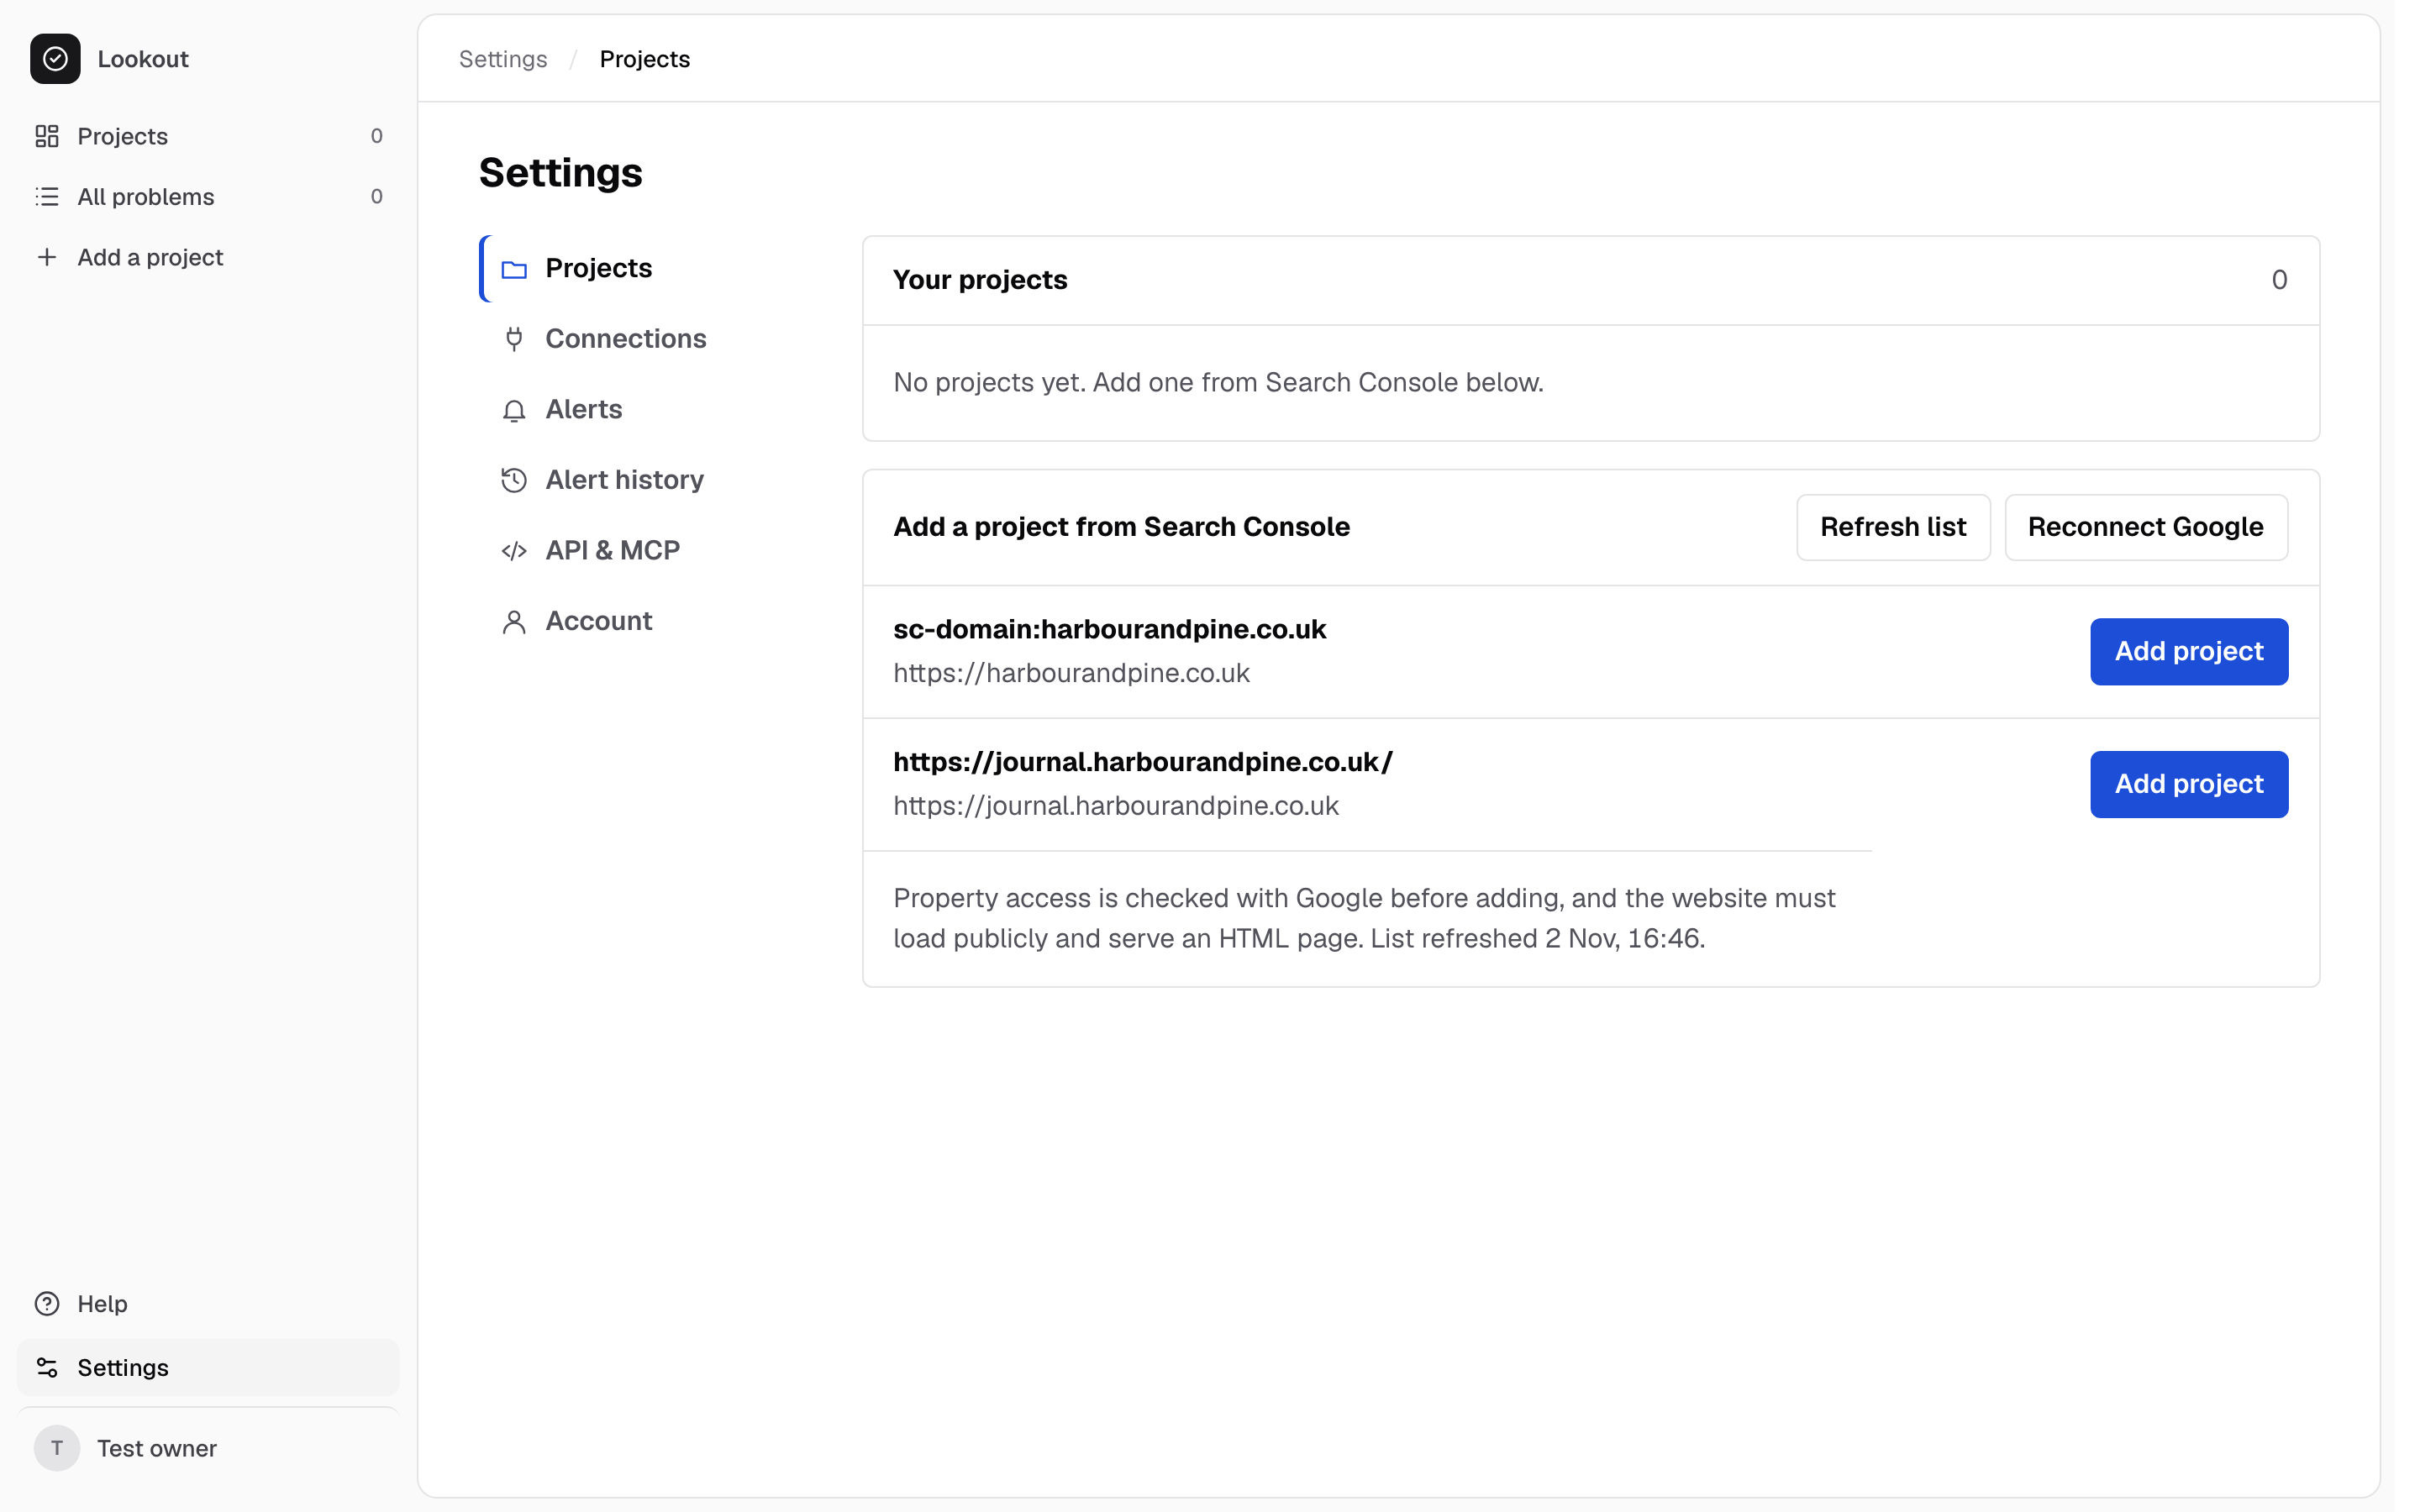
Step 3: Run your first scan
Lookout scans each project every day unless you change its schedule. To start now, choose Run scan at the top of the project. A scan reads up to 7,500 pages, so a large site takes a while; the project shows how many pages it has checked so far.
What to look at next
Each project opens on its Overview: what to fix, uptime, clicks from Google and your speed score. Fix lists each problem with the pages and dates behind it.
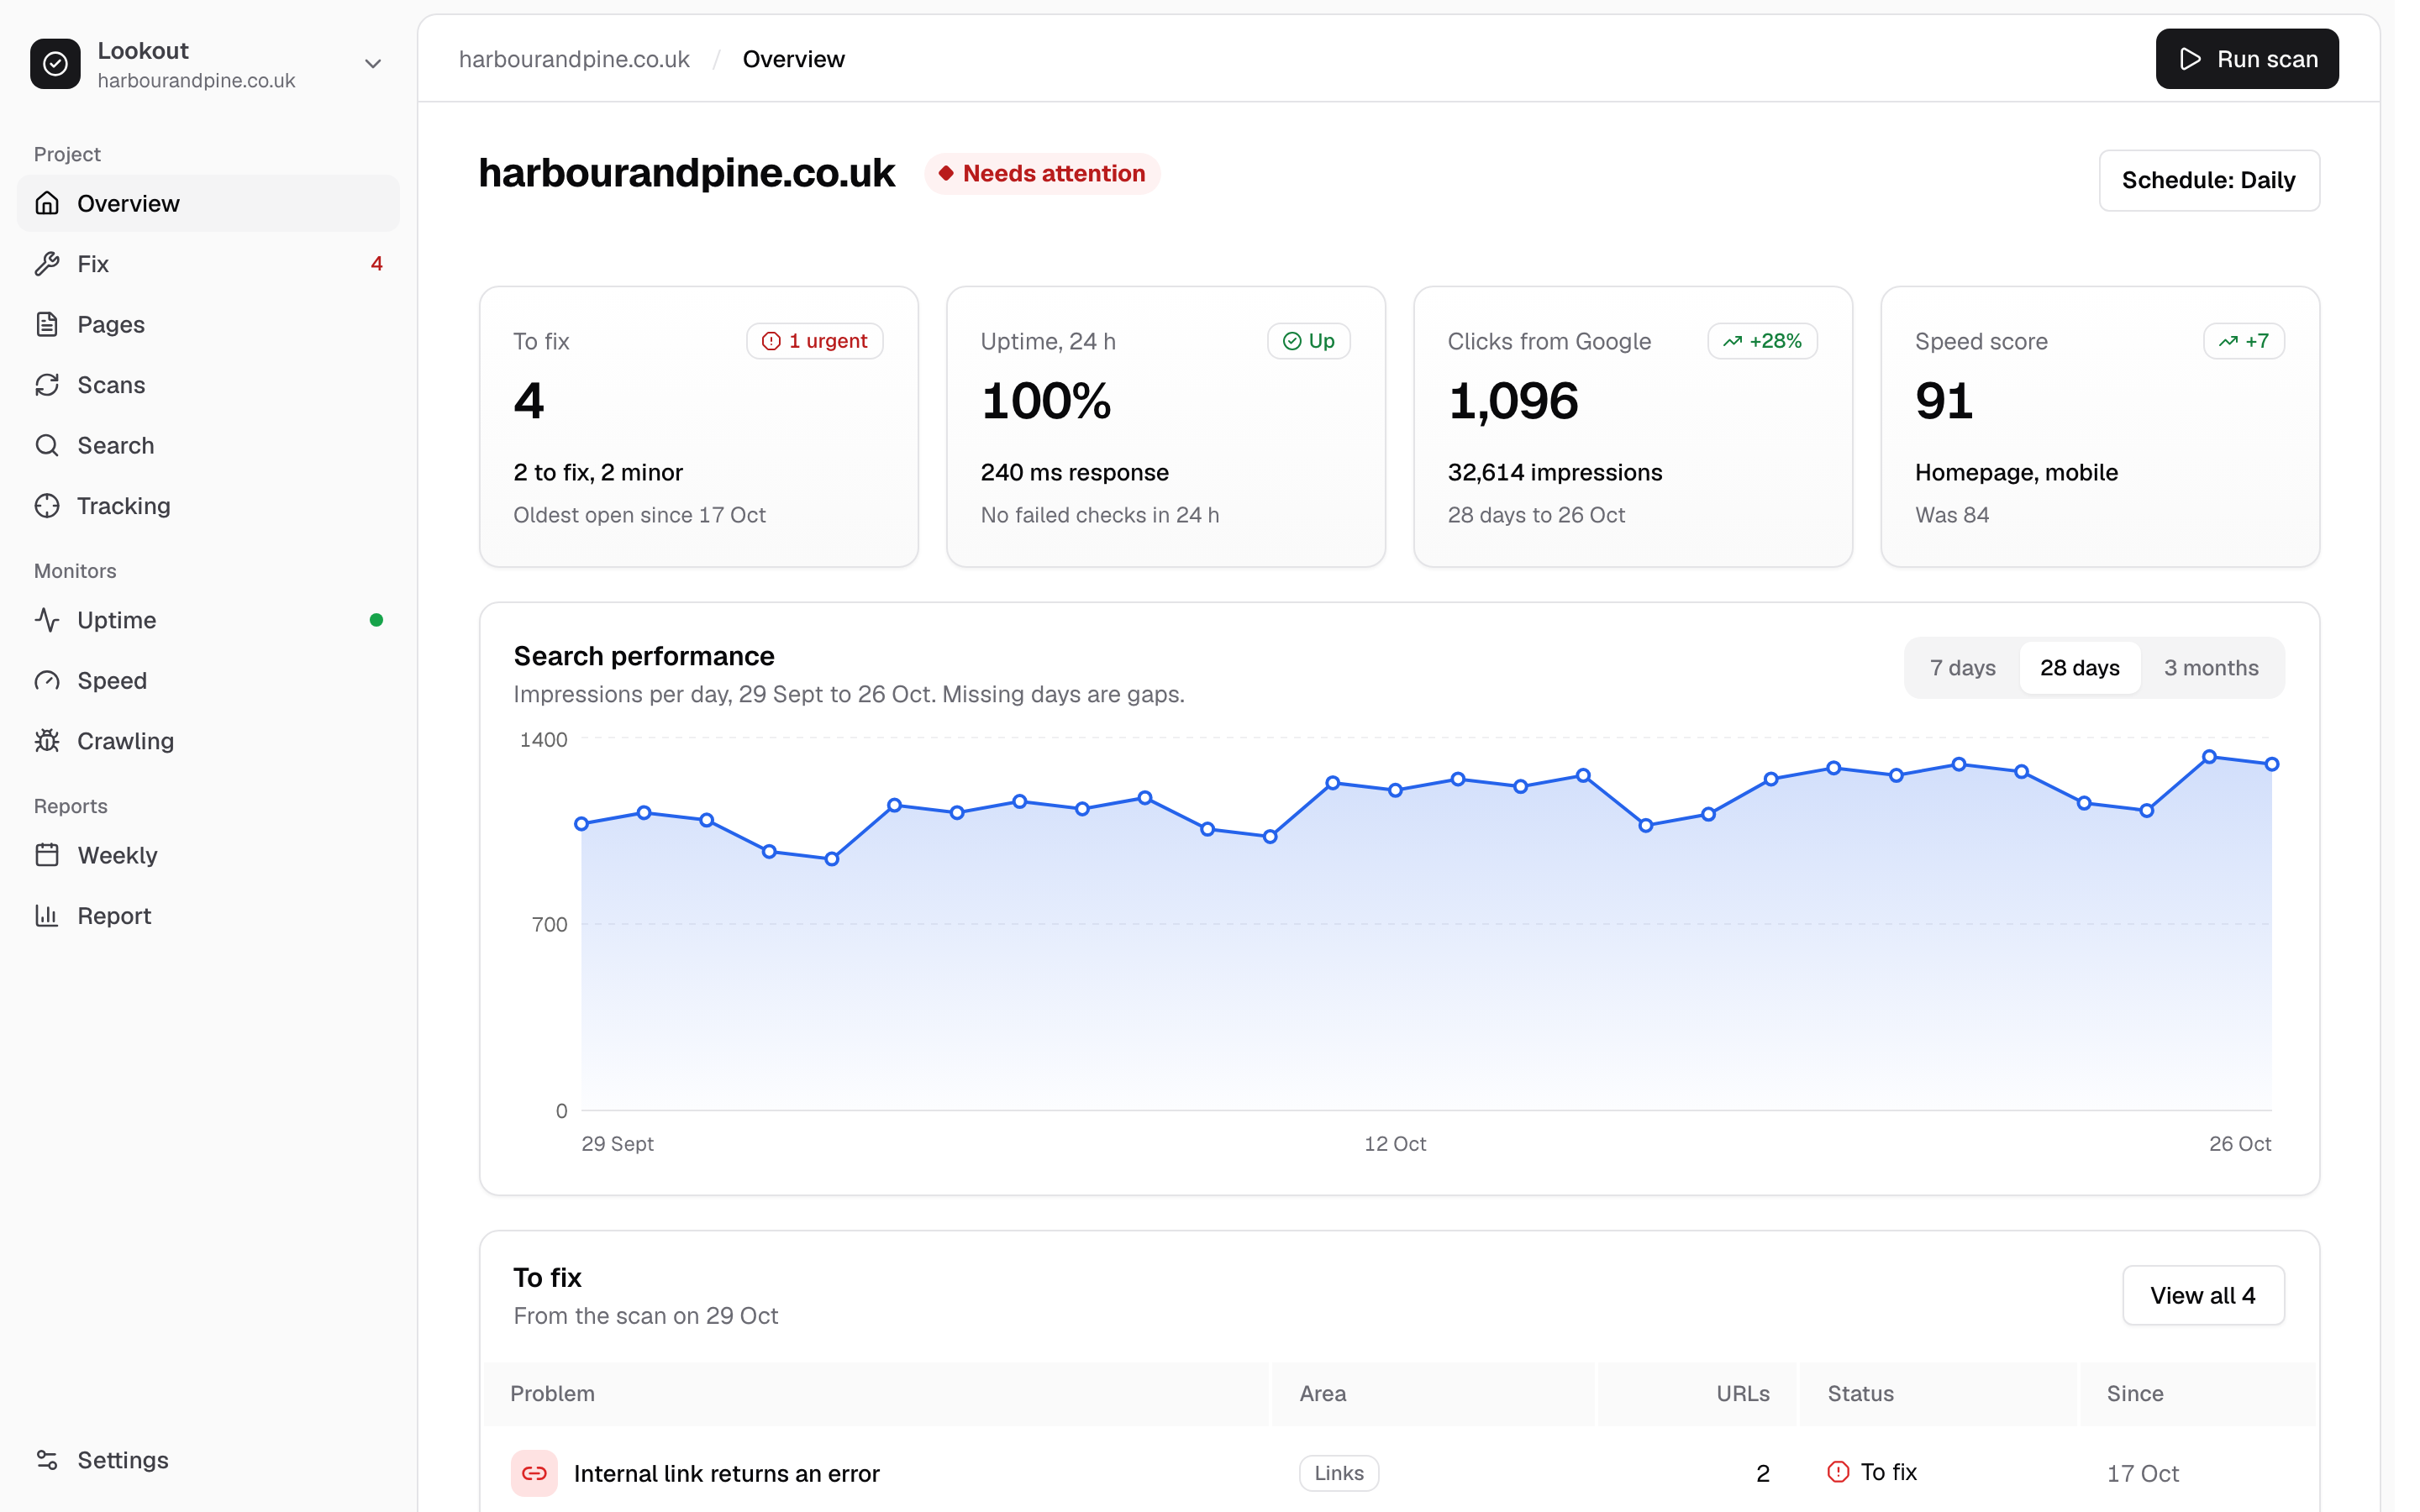
To learn what a scan reads and when a problem counts as fixed, read How Lookout checks a site.